

Quick Summary
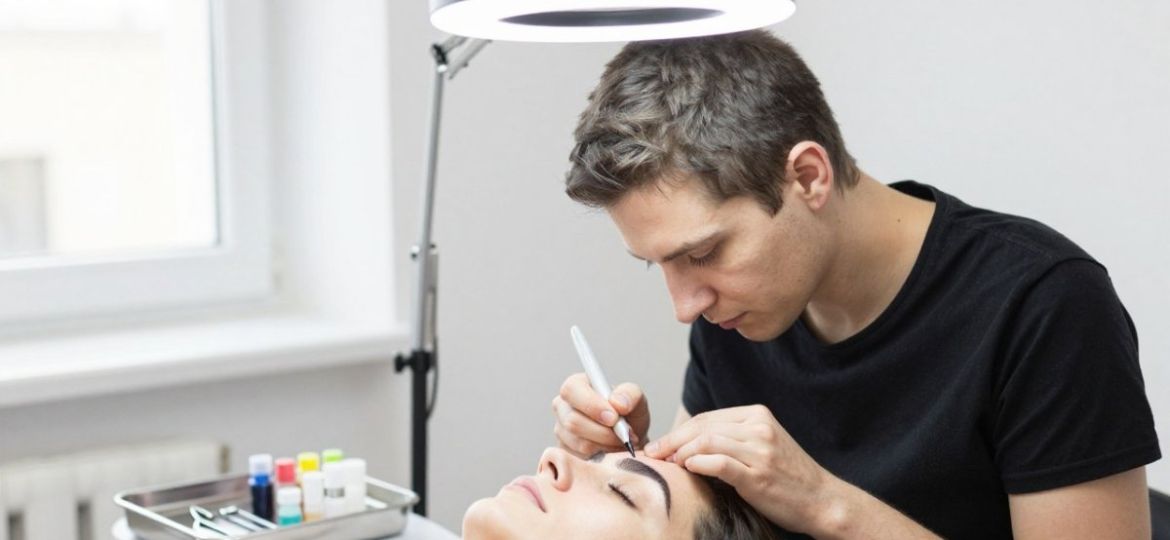
Microblading is a semi-permanent technique that uses a handheld tool with tiny needles to deposit pigment just beneath the skin, creating fine, hair-like strokes. The appointment takes roughly two hours, starting with a consultation and shape mapping, then numbing, pigment matching and strokes. Healing unfolds over about six weeks.
- Your specialist maps a pencil-drawn shape you can approve or adjust before any work begins.
- A topical numbing cream is applied and left in place for a set period before strokes start.
- Brows often look 20 to 30 percent darker on day one than their healed result.
- Avoid picking flakes during days 4 to 7, since this can pull pigment out and leave gaps.
- Most clients book a touch-up around weeks 4 to 6, once the healed result is visible.
Table of Contents
- What Microblading Is and How the Procedure Works
- Who Is and Is Not a Good Candidate
- Preparing for Your Microblading Appointment
- Step-by-Step: What Happens During Your Appointment
- Microblading Healing Process Day by Day
- Microblading Before and After: Setting Realistic Expectations
- Microblading Aftercare and How Long Results Last
- Booking Your Microblading Consultation at iBrow & Beauty Boutique Inc.
- Frequently Asked Questions
What Microblading Is and How the Procedure Works
Microblading is a semi-permanent cosmetic technique that uses a handheld tool with tiny needles to deposit pigment just beneath the surface of the skin, creating fine, hair-like strokes that mimic natural brow hair.
Pigment fades over time, and how long results last depends on factors such as skin type, sun exposure and aftercare.
If you have never had it done, the key thing to understand is that microblading works best on clients who want definition and shape, not complete coverage. The technique suits filling in sparse areas and correcting shape, and it complements your existing brow hair rather than replacing it.
Who Is and Is Not a Good Candidate
Microblading tends to suit adults with sparse or thinning brows, uneven brows, or a shape they want to refine. Clients who have had a previous cosmetic brow procedure and want correction are also common, though those results need a careful assessment before any new work begins.
It is not a good fit for everyone. Clients with certain skin conditions, active skin infections in the brow area, a history of keloid scarring, or who are pregnant or breastfeeding are typically advised to speak with their physician before booking. Clients taking blood-thinning medication or who are prone to unusual healing responses should disclose this upfront.
Preparing for Your Microblading Appointment
Good preparation makes the appointment more comfortable and improves the final result. Avoid blood-thinning substances such as aspirin, ibuprofen and alcohol for about a day before the session, since these can increase bleeding and bruising. Arrive with clean, makeup-free brows.
Think about the shape you want before you arrive. Bring reference photos of brows you like, and be honest about what you dislike about your current brows. This helps your technician map a shape that suits your face rather than a generic template.
Plan for a few hours of downtime afterward. Arrange transport if you are receiving numbing cream, since it can affect how you feel for a while.
Step-by-Step: What Happens During Your Appointment
Most appointments follow a consistent sequence, though the exact timing varies with the amount of work involved.

- Consultation and mapping. Your specialist reviews your goals and measures your face to design a shape. Expect a pencil-drawn outline that you can approve or adjust before anything is done.
- Numbing. A topical numbing cream is applied to the brow area and left in place for a set period. This is the main way comfort is managed, and most clients describe the sensation as pressure rather than sharp pain.
- Pigment selection. The color is matched to your natural hair tone and skin undertone, which affects how the healed brows will look.
- Strokes. The specialist uses the blade to create fine strokes in the pigment area, following your natural hair direction where possible.
- Cleanup and aftercare instructions. Excess pigment is wiped away, and you receive written aftercare guidance before you leave.
Plan for the appointment to take roughly two hours from start to finish, including mapping and numbing time.
Here is a quick overview of the appointment sequence, with the timing the article gives for each stage.
| Step | What happens | Time or detail |
|---|---|---|
| Consultation and mapping | Specialist reviews goals and designs a pencil-drawn shape | Client can approve or adjust before work begins |
| Numbing | Topical numbing cream is applied and left in place | Left on for a set period |
| Pigment selection | Color is matched to hair tone and skin undertone | Affects how healed brows look |
| Strokes | Fine strokes are created with the blade | Follows natural hair direction where possible |
| Cleanup and aftercare | Excess pigment is wiped away and written guidance given | Given before leaving |
| Whole appointment | Mapping, numbing and strokes combined | Roughly two hours |
Microblading Healing Process Day by Day
Healing follows a broadly predictable arc, but the exact pace depends on your skin type, your immune response and how closely you follow aftercare. Skin type can affect how quickly pigment fades and how healing progresses.
Day 1: Brows look crisp, dark and sharply defined, often 20 to 30 percent darker than the healed result. Mild redness, tenderness and slight swelling around the brow area are expected.
Days 2 to 3: Swelling subsides. The pigment begins to oxidize and may look even darker or cooler in tone. A thin, tight feeling develops as the skin starts to close. Cleanse gently with the recommended cleanser and pat dry, never rub.
Days 4 to 7: Flaking and light scabbing begin, usually starting at the edges and tail of the brow. The skin may itch.
Days 7 to 10: Most scabs have shed. Brows can look patchy, uneven or surprisingly light, this is normal and does not mean the procedure failed. The pigment is now sitting in healing skin that is still turning over.
Weeks 2 to 4: Color settles into its true healed tone. Some clients see a slightly cooler or ashier cast that warms up over the following weeks; others see a warmer tone emerge.
Weeks 4 to 6: The healed result is visible. This is the point at which a touch-up is typically booked, because any areas that healed too light, faded unevenly or lost pigment during flaking can be refined.
What Is Normal and What Is a Warning Sign
Normal healing includes redness that fades within a few days, mild tenderness, light flaking, itching and uneven color during the first month. Watch out: contact a qualified professional promptly, and seek medical care if symptoms are severe or spreading, if you notice redness or swelling that worsens after day three, warmth radiating from the area, yellow or green discharge, a fever, or a rash that extends beyond the brow. These can signal infection or an allergic reaction rather than expected healing. Do not self-treat with leftover creams or antibiotic ointments unless a clinician directs you to.
When Healing Does Not Follow the Timeline
Persistent redness beyond two weeks, pain that increases instead of easing, or brows that stay raw and do not flake are reasons to check in with your provider rather than wait it out. Missed pigment in a defined patch is usually a touch-up issue, not a complication. Delayed healing is more common in clients who exercised heavily, sweated, swam or picked at the area during the first week. If you are unsure whether what you are seeing is normal, send your provider a clear photo, most can tell the difference between expected flaking and a problem from an image alone.
Microblading Before and After: Setting Realistic Expectations
Microblading can improve the appearance of sparse or unevenly shaped brows. It cannot create hair volume from nothing, and results depend on your starting point, skin type and healing response.
When reviewing before-and-after photos, look for healed results rather than immediate ones, since fresh work can look harsher.
Set realistic expectations with your specialist during the consultation. A good provider will tell you what can and cannot be achieved with your brows.
Microblading Aftercare and How Long Results Last
Aftercare is the single biggest lever on how long your brows keep their color, and it is also where most fading complaints originate. The rules are simple but they are not optional.
First 7 days: Keep the brow area dry. No washing directly over the brows, no swimming, no saunas, no steam rooms, no heavy sweating and no facials. Do not apply makeup over the brows. Cleanse only as your specialist directs, and moisturize with the product they provide. Avoid sleeping face-down on the treated area if you can.
Weeks 2 to 4: Once flaking has finished, you can return to normal cleansing, but keep exfoliating acids, retinoids and scrubs away from the brow area. These accelerate pigment loss. Sun exposure is the other major fader, once healed, apply a broad-spectrum sunscreen to the brow area daily, and wear a hat for extended time outdoors.
Ongoing: Avoid laser treatments, chemical peels and intense pulsed light directly over the brows, since these can lift pigment unpredictably. If you use retinoids for acne or anti-aging, apply them below the brow line rather than over it.
How Long Results Actually Last
Microblading is semi-permanent, and how long it lasts varies from person to person. Factors such as sun exposure, exfoliation, retinoid use and how closely aftercare is followed can all affect how long results last.
Maintenance and Total Cost of Ownership
Microblading is not a one-time purchase. Touch-up and refresh sessions may be needed over time to maintain the color and shape. Budget for the initial procedure, the first touch-up and a refresh cycle rather than treating the first price as the full cost. For current pricing, visit the iBrow & Beauty Boutique Inc. website.
Watch out: skipping the touch-up is the most common reason clients end up unhappy with their healed result, the first session is designed to be built on, not to be final. Equally, booking a refresh too early, before the skin has fully settled, can lead to over-saturation and a heavier look than intended.
Booking Your Microblading Consultation at iBrow & Beauty Boutique Inc.
Understanding what to expect is the first step toward a result you will be happy with. At iBrow & Beauty Boutique Inc., every client starts with a consultation, so you can ask questions, discuss your goals and decide whether microblading is right for you before committing.
To learn more about the service, visit the microblading service page or browse the microblading range to compare options. If you are concerned about how brows might look, our guide on how to fix uneven microblading walks through common issues and fixes. You can also read about how many microblading sessions you may need and whether the investment fits your budget in is microblading worth the cost.
For current pricing and to book your consultation, contact iBrow & Beauty Boutique Inc. through our website. Founded by Sandra Misiaszek, our boutique is built around natural-looking results tailored to your unique style.
Frequently Asked Questions
Does microblading hurt?
Comfort is managed with numbing before the procedure, and you can speak up during the appointment if you need a break. Some clients feel more sensation along the brow bone or with sensitive skin. Tell your artist about any previous reactions so the numbing approach can be adjusted, and speak up during the appointment if you need a break.
How long does a microblading appointment take?
Appointment length varies, so plan to set aside time for consultation, mapping and aftercare at your first visit. Plan to set aside extra time at your first visit so the shape and color can be reviewed together before you leave.
How long does microblading last?
Microblading is semi-permanent, not permanent, and results fade over time depending on factors such as skin type and sun exposure. Touch-up sessions may be needed to refine color over time.
What should I avoid after microblading?
For the first week or two, avoid getting the brows wet, sweating heavily, picking or scratching scabs, and applying retinol, exfoliants or harsh products to the area. Avoid sun exposure and tanning, and do not use makeup on the brows during healing. Following your artist’s aftercare instructions closely helps protect pigment retention and reduces the risk of uneven healing.
What should I do before a microblading appointment?
Avoid blood-thinning medications such as aspirin or ibuprofen for about a week beforehand, unless your doctor advises otherwise, as they can increase bruising and bleeding. Limit alcohol and caffeine the day before, and avoid waxing, tweezing or tinting your brows in the days leading up to the session. Arrive with clean skin free of makeup, and let your artist know about any skin conditions, allergies or recent Botox or chemical peels.
How long does microblading take to heal?
Healing time varies with skin type, age and aftercare. Color may look darker at first and soften as flaking occurs before the true color settles. Healing can vary with skin type, age and aftercare, so a slower timeline is not always a cause for concern.

